

Photopea 2.3 – six new tools!
New release of Photopea is out! It has 37 400 lines of code. Play with it at the main site.
New features
- Blur Tool, Sharpen Tool, Smudge Tool
- Dodge Tool, Burn Tool, Sponge Tool
- Flow parameter added to Brush, Eraser and Clone Stamp tools
- Offset filter (Filter - Other - Offset)
- Several bugs fixed
Six new tools for image editing have been added to Photopea today. You may already know these tools from other editors (Adobe Photoshop, Gimp, Pixlr, ...). While there are six separate tools in Photoshop and Pixlr (and Photopea), in Gimp, Blur and Sharpen are connected into a single tool, as well as Dodge and Burn.
All these tools behave like brushes. You can choose a specific diameter and a hardness of the tip, as well as many other parameters of brushes (in the Brush window). All of them can be applied to raster masks, too.
Blur, Sharpen, Smudge
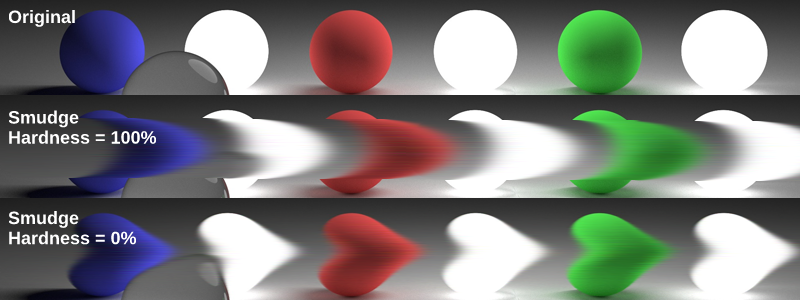
The Blur Tool can be used for bluring specific areas of an image, same for the Sharpen tool. The Smudge tool is probably the most advanced of them all. It is the analogy of moving your finger across the wet paint on the painting. You can spread colors to other areas, make object longer or shorter, or move the border between two objects.
Dodge, Burn, Sponge
Dodge and Burn tools can be used to make image lighter or darker. As in other editors, you can choose, whether you want to dodge shadows, midtones or highlights. Use Sponge tool to saturate or desaturate specific areas of an image.
Right now, these tools are located in two separate tool groups, just as in Adobe Photoshop. Let us know, if you would prefer other locations of these tools.


